Only when BLACK LIVES MATTER will all lives matter
Many of the features of this website use JavaScript. Your browser either doesn't support Javascript, or you have it disabled. You will need Javascript enabled to view our complete class descriptions or use our otherwise convenient registration and email links.
If you'd rather, you can reach us directly by phone: Mike - 617 230 9572 or Carl - 781 608 0900
Better than sneezing into your elbow
"My mask protects you, your mask protects me." #Masks4ALL
A plain cloth* mask does a lot to stop the passage of droplets of wetness, be they saliva, mucus, sweat... whatever.
One of the insidious things about this Covid-19 virus is that you can have it, be infected with it, and feel just fine. And be contageous.
You can have it for a few days before you start feeling sick, you can have it for the whole course of its time in your body and never feel sick. And be contageous that whole time.
If we had good, 100% reliable, tests (but we can't and won't) we could know who's contageous, who's had it,
and who hasn't (but we can't and won't) and behave accordingly.
But!
As mentioned (above), we can't know these things, so we all have to act like we have it in spite of our lack of symptoms
and could spread the infection to others and never even know it.
That means staying away from other people as much as we can, and when we must go out in public,
we have to do what we can to protect other people and hope that they will do the same for us.
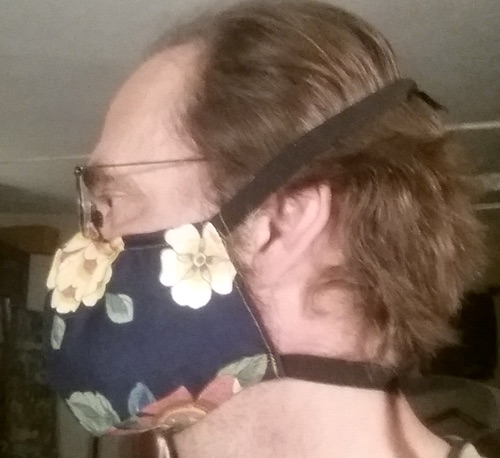
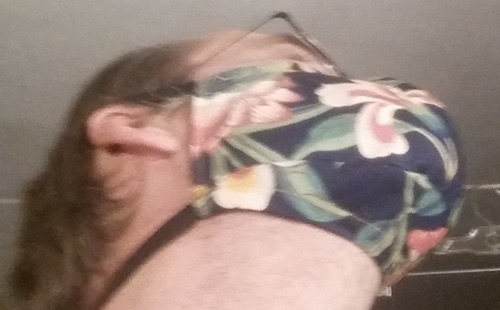
As a bearded person, my experience with dust masks is that I get a poor seal because of my facial hair, and the mask leaks on both the in- and ex- hale.
For our anti-Covid-19-spread purposes the leaky exhale is the worst part.
This mask pattern reaches way back on the face, and for me anyway,
that makes it so that most of the air that goes in or out of my body passes through the cloth of the mask
before getting all the way to the edge and going around. All of it? I can't know, but when I exhale, I only feel the warmth of it partway back my cheeks.
I'm pretty happy with this pattern. It's more involved than others, I don't expect them to get made en masse, but I hope they can enable some bearded folk
to lower their risk of infecting others.
These instructions have been written with the I-almost-never-sew person in mind, so they're on the verbose side.
You will need:
- A sewing machine and some idea how to run it, or to be handy with a needle.
- Tightly woven cloth, but not so tight that you can't breath through it. Cotton or a cotton blend seems to be preferred
- Cardboard to cut the pattern out of (cereal box works well)
- A tool to cut the cardboard.
- Pins
- Elastic 1/4" wide to 1/2" wide... or string or some other material to use for ties
- A piece of wire for over the nose, it's described in step 21.
- Pliers, perhaps
- Something to mark your fabric with
- A tool for cutting your fabric
- A clothes iron and a surface to use it on.
First Thing:
Read this all the way through once.
It won't all make sense on the first pass, that's OK. It's expected.
Then read it again.
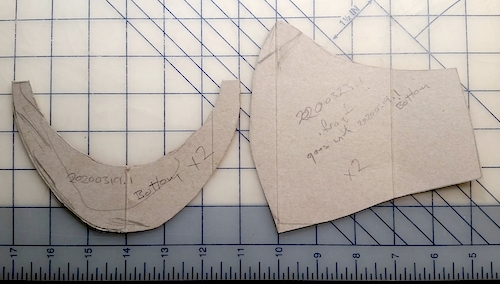
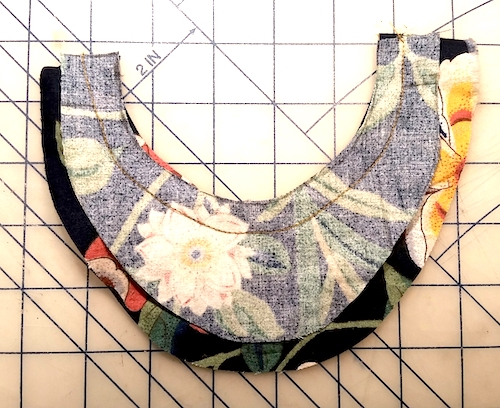
1) The pattern pieces
These cardboard patterns were made to mark the actual seam-lines in the mask. Seam and hem allowances are to be added when marking out on the cloth.
Note: they are photographed on a 1" grid. Measured with a ruler pressed right up to the bone (Not comfortable), my jaw measures 4.5" across at the back corners. If you print this image out to make your pattern, printing it at a scale that makes 4.5" on the grid match your actual jaw measurement would be a good thing.
The piece on the left is the part that goes beneath the chin, you'll cut two, one with seam and hem allowance all around,
and one with seam and hem only on the ends and inside curve. (I expect this to become clearer on your second read-through).
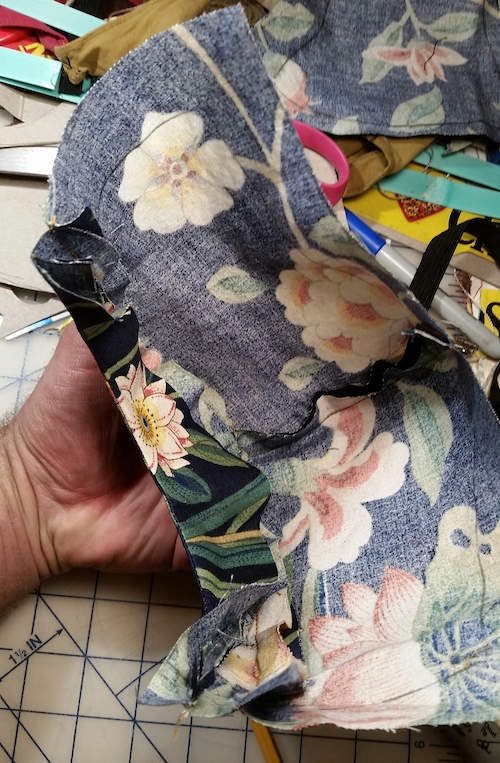
The piece on the right is the cheek piece, you'll cut at least two, four if your fabric is on the thin side.
The fabric in these pictures is light upholstry.
(NOTE: There is currently no printable pattern, .PDF or otherwise.
But do notice that these pattern pieces were photographed on a 1" grid. My jaw measures 4.5" straight-line across the back, and it's 3.25" from the tip of my nose to the tip of my chin. I hope that helps.)
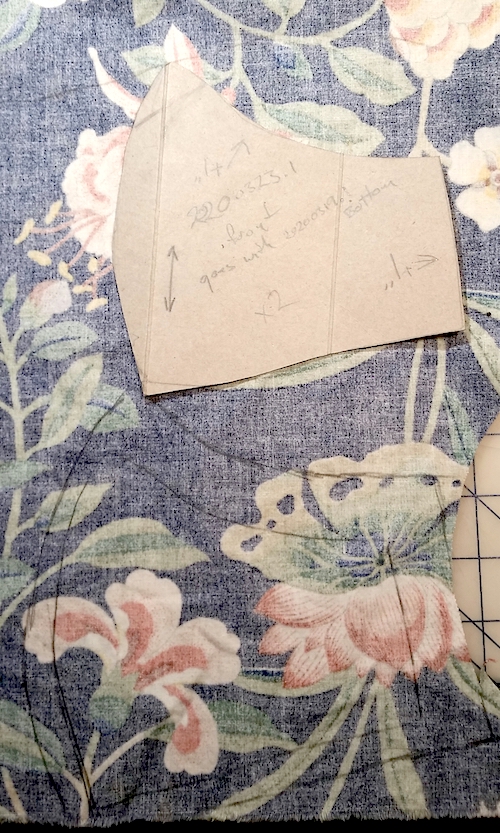
2) The cheek marked out on the fabric
The top and back (on the right in this picture) get an inch of hem allowance,
the front and bottom get whatever allowance you're accustomed to sewing (at least 3/8", as much as 5/8").
Mark out one, then flip the pattern and mark out the other side...
... assuming your fabric has a good side, and you care.
The double-ended arrows on the pattern pieces indicate the direction of the 'grain' of the fabric.
That is, the arrow should line up with one or the other set of threads in the fabric.
(I will be trying one of these 'on the bias' (45 degrees) I may be back with an edit)
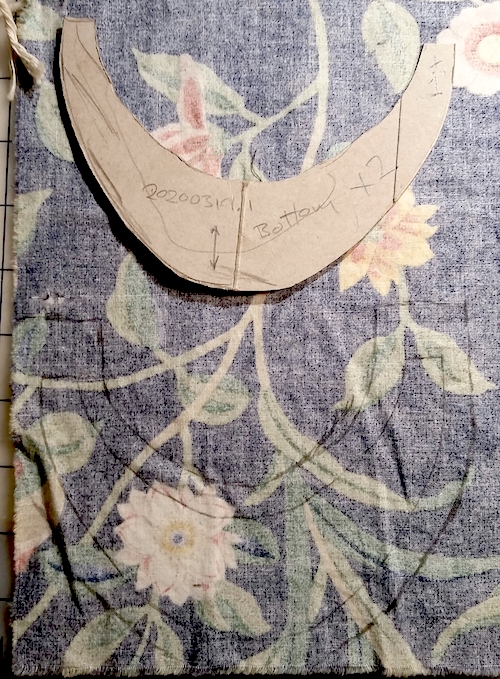
3) The chin marked out on the fabric
The inch of hem allowance only happens on the tips of this piece.
One piece gets seam allowance only on the inside curve, the other gets it on both the inside and out.
No need to flip this pattern, it's symmetrical.
Mark the center of the outer curve on the piece that has the hem allowance.
This is a fine time to start the iron heating up.
4) The pieces for a single-layer mask
Note the left and right cheek pieces... remember to flip the pattern over.
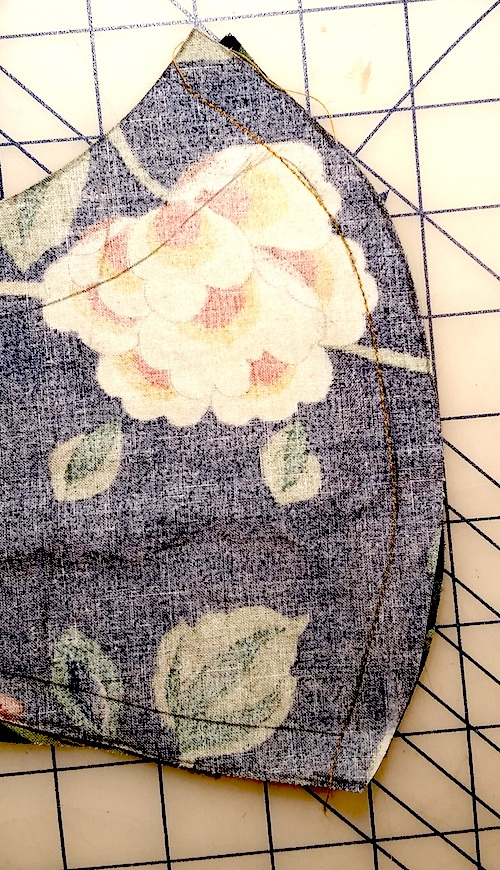
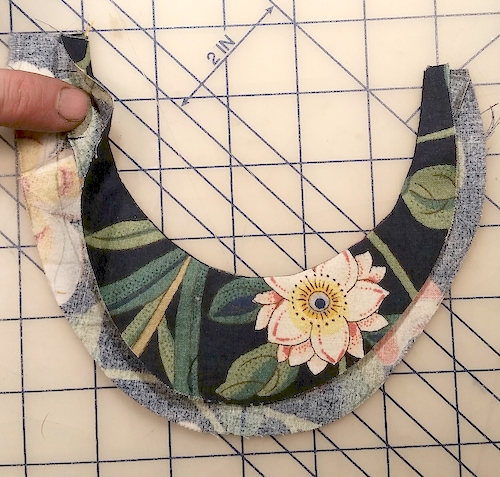
5) Cheeks sewn together
Put the cheek pieces good-side-in. (I carefully lined up the seam markings with pins,
but that's my background as an armorer showing through. When you're putting metal parts together,
it's vital that you get it right the first time, you can't reasonably move a rivet over just a little.)
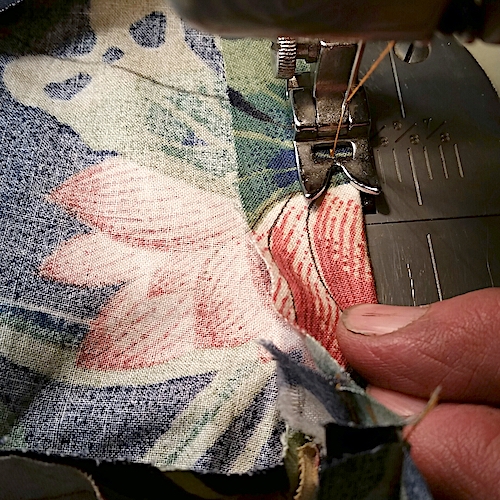
Run the stitch line out through the hem allowance at the top and the seam allowance at the bottom.
The stitching is orange, if you look close, it's there.
The curve of this front seam is inspired by (stolen from) the Fu Mask.
It's easier than darting a flat piece, and gives a nice fit over the nose.
6) Pressing the Seam to the side
The top of this seam should be pressed all to one side or the other to facilitate the
installation of the nose-wire later on.
I pressed to the left.
(This is probably the least clear photograph of the lot. Sorry 'bout that)
7) Sew the chin pieces together
Place the two chin pieces good-sides together, line up the inner edges and pin them together.
Start pinning in the center, and work out to the ends.
Sew along the seam line. All the way out through the hem allowance.
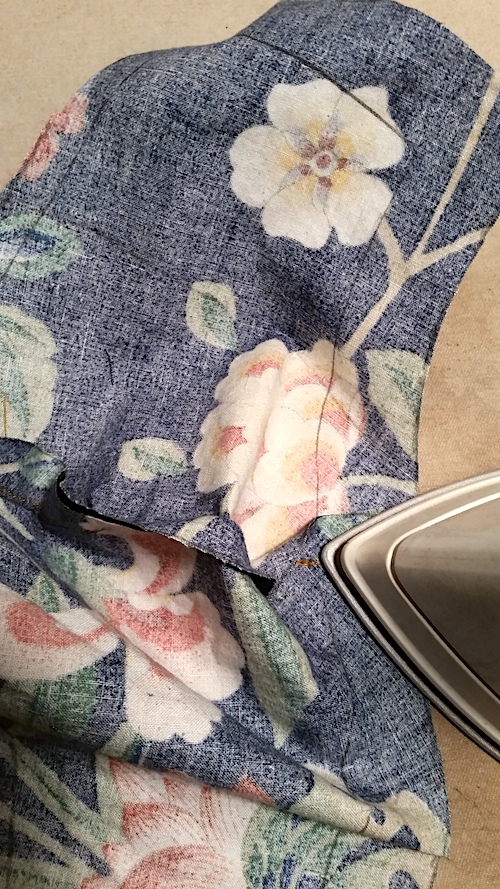
8) Notch the inside seam allowance
The fabric that is on the inside of this curved line of stitching is soon going to have to be on
the outside of the line and it is not long enough, nor stretchy enough to do it gracefully.
DO NOT cut all the way to the seam.
If you are working with stretchy material, it is likely unnecessay to do this notching (or the pressing that follows).
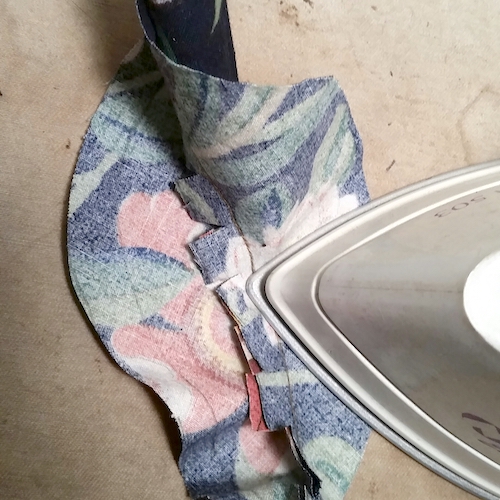
9) Press the seam one way
Just so y'know: This is going to be an awkward piece of stuff for the next couple minutes.
Open out the seam, putting the good sides down on the ironing board, hold one side down with
the tip of the iron and draw a bit of tension on the other side with your fingers, then slide
the iron over the seam, pressing the 'tabs' flat.
Do this all along the seam.
A bit of spray starch can really help with this.
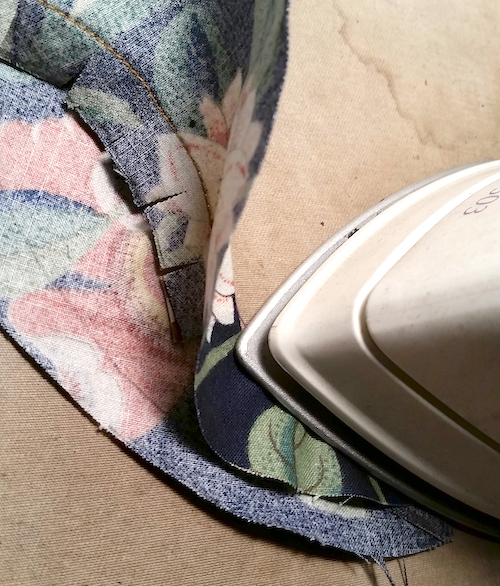
10) Press the seam flat
Press again with the good sides on the outside, keeping the seam at the very edge.
This puts the good sides on the outside of the assembly and will present a finished edge to the neck.
11) The assembeled chin piece
With a little peek in to where the 'tabs' are.
The smaller piece is the 'facing', it will be on the inside of the mask and left loose.
12) Pin the facing back
Keep it out of the way for the next move.
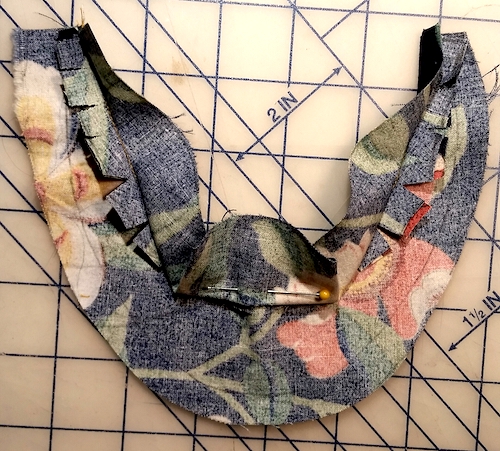
13) Pin the cheeks to the chin
Good-side to good-side.
Align the centermark on the chin assembly with the center seam on the cheek assembly, pin there,
and work out to each end.
Then sew along the seam line.
Take care to keep other bits out of the stitching, this is still an awkward bit of stuff.
An experienced sewist will be able to manage this without all the pinning.
Do your best to not sew over pins, most of the time the needle misses the pin,
but every now and then it scores a direct hit and often breaks the needle.
Enough direct hits, and the timing of the machine can suffer.
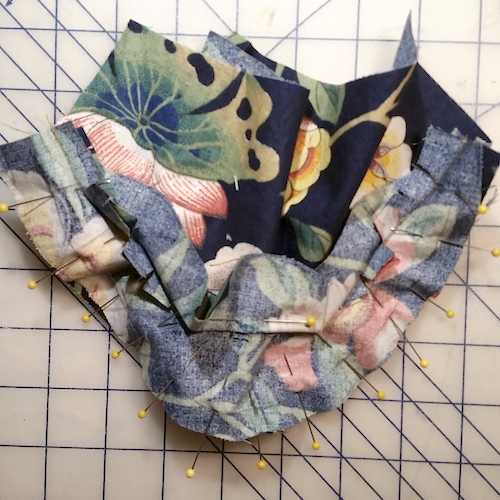
14) Main seam sewn, mask inside out
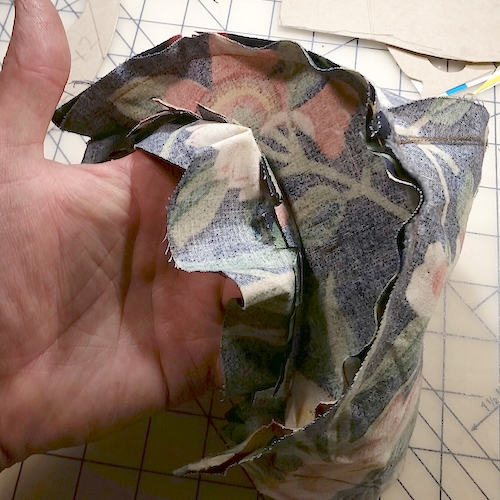
15) Right side out
...but still seen from the inside
note the chin facing is on the inside of the mask.
16) Hemming the ends
Fold the ends in at the 1" mark, press if you like, and run a line of stitches about 1/4" from the fold.
Leave the edges loose! Yeah, it's bad sewing form, but here's my theory/intent:
The object of the game here is to keep air from getting out the sides, top, and bottom of
the mask and instead force it through the cloth, thus trapping many, most, or maybe all
of your exhaled/coughed/sneezed droplets. Having an extra flap of fabric in the path of air
trying to escape out past the edge of the mask will help prevent that very thing from happening.
That's why the loose facing in the chin, and the wide loose hems on the sides and top.
Will it be perfect? No, but it's a try, it might help, AND it's slightly less work for the sewist.
We're playing percentage games here, there is no perfect protection.
We do what we can to make it better with what we've got. I think this helps.
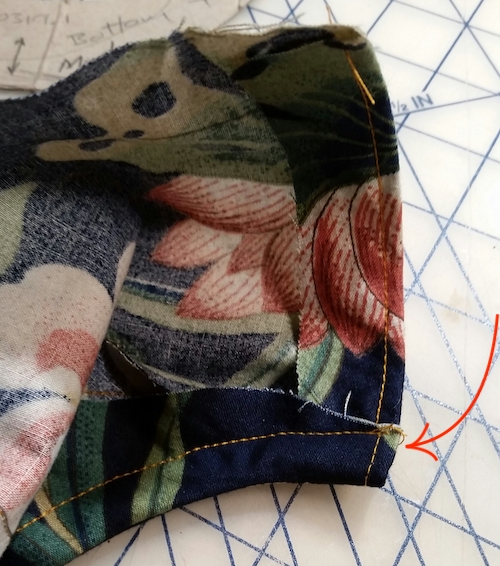
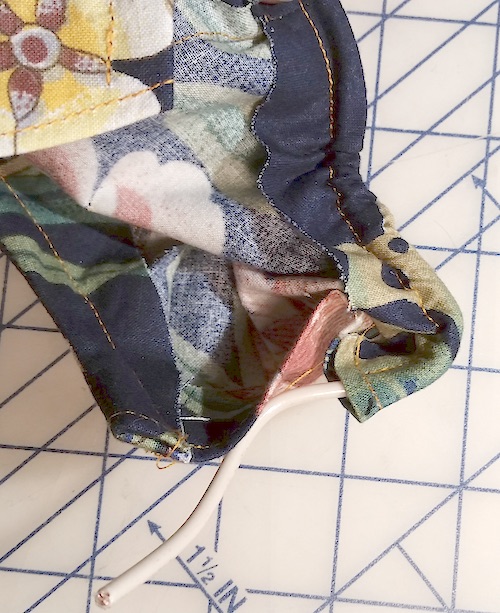
[This would have been the perfect time to add in the ties or elastics. Holding them in place just inside the top and bottom hem lines. right where the arrow is pointing in the next picture.]
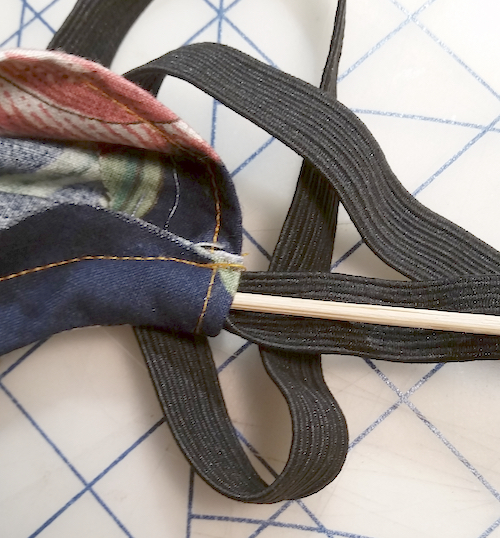
Tucking the elastic into the end of the bottom hem with a bamboo skewer before tacking it down, because I failed to attach it when I ought have.
Don't be this guy, put the elastics or ties on at this stage..
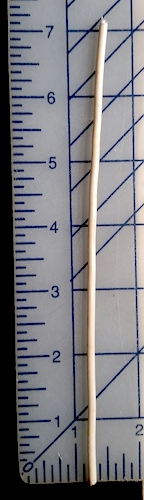
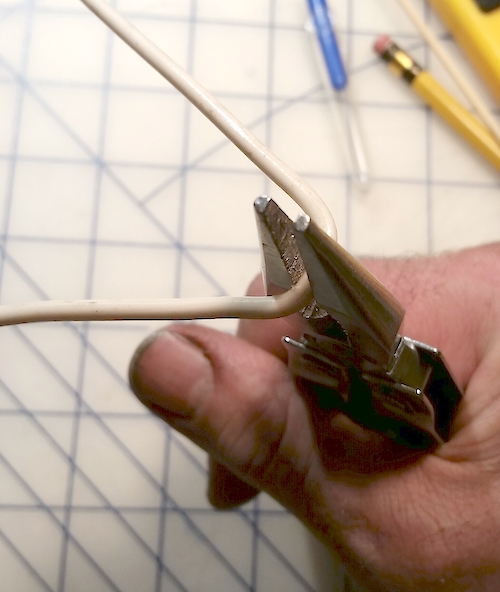
21) Nose wire
I used a piece of insulated solid 14ga copper wire for over the nose. Apparently as thin as 20ga will work.
The metal bits in commercial masks are as small as they can get away with making them.
We can be extravagant and have a chance to get a slightly better fit farther across the face, and thus have less leakage.
Any wire soft enough to bend with your fingers with a little bit of effort should do this job.
The wire handle from one of those white cardboard takeout containers can be useful for this,
You'll want to bend the ends back on themselves with pliers to keep them from having sharp, pokey ends
This wire I used is pleasantly long, it could even have been a little longer.
22) Bend the middle of the nose-wire
Find the middle of the wire and bend it around to fit say, your finger. Not too tight a bend, not too big.
If your wire is soft enough to not require pliers to do the nose bend, you can do the next step with it straight, and bend it in place.
23) Install the wire
It is important now to remember which way you pressed that first seam you sewed.
If, as I did, you pressed to the left, you want to enter from the right.
Otherwise, do otherwise.
Work the casing over the wire until the center seam is at the middle of the bend.
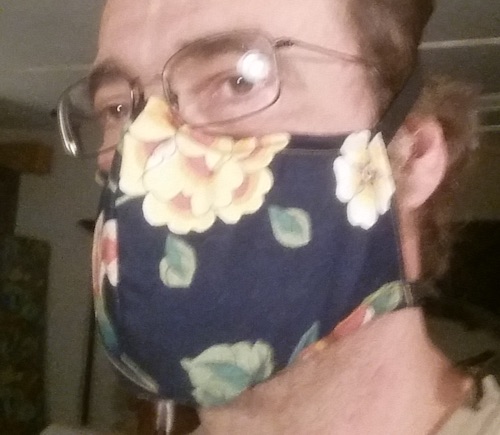
24) Straps, elastics, ties
I used some 3/8" elastic I had leftover from dead shop goggles.
I started by sewing in 7" pieces on all four corners, then tied knots to get decent tension.
After putting the mask on I realized I could get away with just the 7" piece across the bottom,
so I picked out stitches and put the bottom elastic on without a knot.
Further wearing suggested a split strap on the top that splits about 2 inches from the mask,
part goes over the top of my head, and part goes around back (which I don't have a picture of yet).
If elastic is in short supply, you can use strings or cloth ties, if you have a little elastic,
adding some in on the lower connection will help a lot. The top of the skull shouldn't be moving relative to the face,
but the back of the neck does, and getting some springiness in there would help maintain the fit.
25) Getting it to fit
You're going to have to play with the wire to get it to fit your cheeks and seal well around your nose.